How to Record Your Screen on Any Device
Learn how to record your screen on Windows, Mac, iPhone, Android, and Chromebook with these 7 easy, no-cost methods.
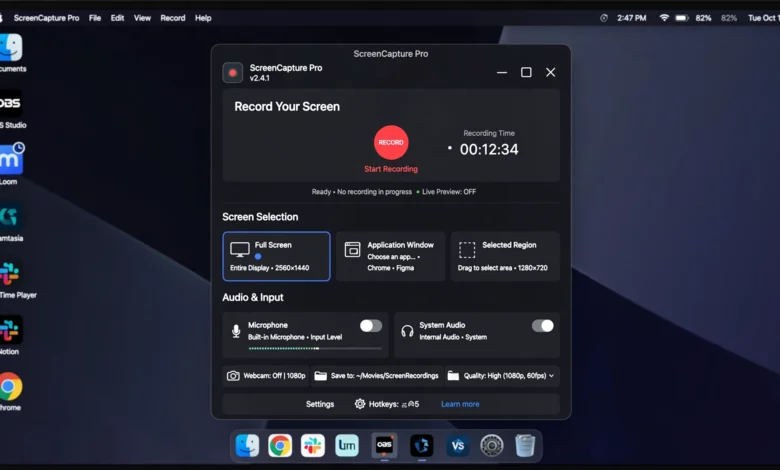
How to record your screen is one of those questions that sounds simple until you actually sit down to do it and realize every device handles it a little differently. Whether you’re trying to capture a bug for your IT team, put together a quick tutorial, save a funny moment from a video call, or record a presentation for coworkers who couldn’t make the meeting, knowing how to record your screen is a genuinely useful skill in 2026. The good news is that you almost certainly don’t need to download or pay for anything. Windows, Mac, iPhone, iPad, Android, and even Chromebooks all come with a built-in screen recorder these days, and most of them take less than a minute to figure out.
In this guide, we’ll walk through exactly how to record your screen on every major device, step by step, with no jargon and no guesswork. We’ll cover the built-in tools first since they’re free and already sitting on your machine, then we’ll look at browser-based and third-party screen recording software for people who need extra features like editing, webcam overlays, or cloud sharing. Along the way, we’ll flag common problems (like missing audio or huge file sizes) and how to fix them, plus a few tips that will make your recordings look more professional without any extra effort.
By the end, you’ll be able to record your screen on any device you own, save the video wherever you want, and share it in a couple of clicks. Let’s get into it.
Why You Might Need to Record Your Screen
Before we get into the how, it helps to know the why, since the best method for you often depends on what you’re trying to accomplish. People record their screen for all kinds of reasons:
- Creating step-by-step tutorials or how-to videos for work or YouTube
- Reporting a software bug or glitch to a support team
- Recording a webinar, online class, or video call for later reference
- Capturing gameplay or app demos
- Saving a Zoom or Google Meet presentation
- Making product walkthroughs for clients or teammates
- Documenting something on a website (like a receipt or confirmation page) before it disappears
Whatever your reason, the process usually comes down to three basic steps: turning on the screen recorder, choosing what part of the screen to capture, and deciding whether you also want your microphone or webcam included. Once you’ve got that down, everything else is just details specific to your device.
How to Record Your Screen on Windows
Windows has actually gotten pretty good at this. You don’t need any extra software to record your screen on a Windows PC, whether you’re on Windows 10 or Windows 11. There are two built-in tools worth knowing: Xbox Game Bar and, if you’re on Windows 11, the updated Snipping Tool.
Method 1: Using Xbox Game Bar
Xbox Game Bar isn’t just for gamers. It’s Microsoft’s built-in overlay that works in almost any app, and it’s the most reliable free way to record your screen on Windows 10 or 11.
- Press Windows key + G to open Xbox Game Bar.
- If it’s your first time using it, confirm that you want to open Game Bar when prompted.
- Look for the Capture widget. If you don’t see it, click the widget menu icon (three horizontal lines) and select “Capture.”
- Click the circular Record button (or press Windows + Alt + R as a shortcut).
- A small toolbar will appear showing your recording is in progress and how long it’s been running.
- When you’re done, click the square Stop button, or use the same keyboard shortcut again.
Your recording saves automatically as an MP4 file, and Windows will usually show a notification linking straight to the folder. By default, that’s the Videos > Captures folder on your PC. One thing worth knowing: Xbox Game Bar only records the active app window, not your whole desktop or File Explorer, so it’s best for capturing specific programs rather than general screen activity.
Method 2: Using Snipping Tool (Windows 11)
If you’re on Windows 11, Microsoft added video recording directly into the Snipping Tool, which used to be a screenshot-only app. This is now arguably the easiest way to record your screen if you just want to capture a specific area rather than a full app window.
- Open the Snipping Tool from the Start menu.
- In the toolbar at the top, click the Record button, then New.
- Drag a rectangle over the part of the screen you want to capture.
- Click Start, and after a short countdown, your recording will begin.
- When you’re finished, click Stop.
- You can then copy the clip, save it, or share it directly.
Keep in mind that as of this writing, Snipping Tool’s built-in recorder doesn’t support audio capture, so if you need narration or system sound, Xbox Game Bar is the better option for now. For a closer look at both tools, Microsoft’s own guide on <a href=”https://www.microsoft.com/en-us/windows/learning-center/how-to-record-screen-windows-11″ target=”_blank” rel=”noopener”>how to record your screen on Windows 11</a> covers some additional settings and troubleshooting tips.
How to Record Your Screen on a Mac
Mac users have it just as easy, thanks to the built-in Screenshot toolbar that’s been part of macOS since Mojave.
- Press Shift + Command + 5 to open the Screenshot toolbar.
- You’ll see options to record the entire screen or just a selected portion. Choose whichever fits your needs.
- If you want to include narration, click Options and select a microphone under “Microphone.”
- Click Record.
- To stop, click the Stop icon in the menu bar at the top of your screen, or press Command + Control + Esc.
Your recording is saved to the desktop by default, though you can change that under the Options menu before you start. Macs also let you record just a single window, which is handy if you’re demoing an app and don’t want your desktop clutter showing up in the background.
If you need something with more control, like recording your Mac’s internal audio (not just your voice), QuickTime Player offers a “New Screen Recording” option under the File menu that works similarly, with a few extra settings for advanced users.
How to Record Your Screen on iPhone and iPad
Apple built screen recording directly into iOS and iPadOS, and it’s genuinely one of the simplest screen recorder tools out there once it’s set up.
First, add Screen Recording to Control Center (you only need to do this once):
- Go to Settings > Control Center.
- Scroll down and tap the + next to Screen Recording to add it.
Then, to actually record your screen:
- Swipe down from the top-right corner of your screen to open Control Center (or swipe up from the bottom on older iPhones with a Home button).
- Tap the gray Record button and wait for the three-second countdown.
- Exit Control Center; your recording has already started.
- To capture your voice along with the screen, press and hold the Record button first, then tap the microphone icon to turn it on before starting.
- To stop, tap the red status bar at the top of the screen and select Stop, or open Control Center again and tap the red Record button.
Your recording saves automatically to the Photos app. According to Apple’s official support page on <a href=”https://support.apple.com/en-us/102653″ target=”_blank” rel=”noopener”>how to record the screen on iPhone and iPad</a>, some apps may restrict audio or video recording for content protection reasons, so if a recording comes out blank inside a specific app, that’s usually why.
How to Record Your Screen on Android
Android’s screen recording has improved a lot over the last couple of versions, and most phones running Android 11 or later have it built in without needing a third-party app. That said, the exact steps can vary slightly depending on your phone’s brand (Samsung, Pixel, OnePlus, etc.), since manufacturers customize the interface.
On a stock Android or Google Pixel phone:
- Swipe down from the top of the screen twice to open the full Quick Settings panel.
- Look for the Screen Record tile. If you don’t see it, tap the pencil/edit icon and drag it into your Quick Settings.
- Tap Screen Record, choose whether to include audio (device sound, mic, or both), and tap Start.
- A countdown will begin, then recording starts.
- To stop, tap the time indicator or the recording icon at the top-left of the screen, then select Stop.
On Samsung Galaxy phones:
- Swipe down to open Quick Settings.
- Tap Screen Recorder (you may need to swipe to a second page of tiles).
- Choose your audio settings and tap Start Recording.
- Stop it the same way, through the notification or floating toolbar.
Your finished video is saved to your Gallery or a dedicated “Screen Recordings” folder, depending on your phone. One thing to note: some banking apps and streaming services (like Netflix) block screen recording entirely for security reasons, so if your recording comes out as a black screen, that’s the app’s doing, not a glitch on your end.
How to Record Your Screen on a Chromebook
Chromebooks also have a built-in screen recorder, and it’s one of the more overlooked features of ChromeOS.
- Press Shift + Ctrl + Show Windows key (the key with rectangles on it, usually where F5 is).
- A small toolbar will appear at the bottom of the screen with screenshot and screen recording options.
- Select the Screen record icon.
- Choose whether to record the full screen, a specific window, or a selected portion.
- Click inside the area you want to capture to start recording.
- To stop, click the recording icon in the bottom-right corner of the screen (near the clock) and select Stop.
Recordings save directly to your Chromebook’s Downloads folder as a webm file, and you’ll get a notification once it’s ready to view or share.
How to Record Your Screen Using a Browser (No Download Needed)
If you’re on a computer that isn’t yours, or you just don’t want to dig through system settings, there are browser-based tools that let you record your screen directly from a tab, no installation required. These work on Windows, Mac, or Chromebook, as long as you’re using a modern browser like Chrome or Edge.
Most of these tools follow the same basic pattern:
- Go to the recorder’s website and click Start Recording.
- Choose whether you want to capture a browser tab, an application window, or your entire screen.
- Grant permission for the browser to access your screen (and microphone, if needed).
- Record your content, then click Stop.
- Download the file directly to your computer, often with no watermark or account required.
Browser-based recorders are a solid backup option, especially for quick, one-off recordings where installing new software feels like overkill.
Best Screen Recording Software for More Advanced Needs
Built-in tools cover the basics, but if you’re regularly making tutorials, training videos, or polished presentations, dedicated screen recording software gives you a lot more control. Here’s what to look for and a few well-known names worth checking out:
- OBS Studio — Free and open-source, popular with streamers and educators who want multiple sources (screen, webcam, and audio mixing) in one recording.
- Loom — Great for quick, shareable video messages with automatic cloud upload and a link you can send instantly.
- Camtasia — A paid option built specifically for tutorial creators, with strong editing tools baked right in.
- ScreenPal — A free and easy-to-use option with built-in editing, webcam overlay, and voice narration.
When choosing software, think about what actually matters for your use case:
- Do you need to edit the video afterward, or is a raw recording fine?
- Do you need to record your webcam alongside your screen (picture-in-picture)?
- Will you be sharing a large file, or do you need a shareable cloud link instead?
- Do you need to record long sessions (over an hour), which can affect file size and storage?
For most casual users, the built-in tools we covered above are genuinely enough. Third-party software really starts to pay off once you’re producing content regularly or need editing features that the native tools don’t offer.
Tips for Better Screen Recordings
Once you know how to record your screen, a few small habits can make a big difference in how professional the final result looks:
- Close unnecessary tabs and apps before you start recording so notifications and clutter don’t sneak into the frame.
- Turn on Do Not Disturb to stop text messages, emails, or app alerts from popping up mid-recording.
- Plan a rough outline if you’re narrating, even just a few bullet points, so you’re not rambling or repeating yourself.
- Check your audio levels before a long recording. Nothing is more frustrating than finding out afterward that your microphone wasn’t picking up sound.
- Record in short segments if you’re making a tutorial. It’s much easier to edit and re-record a two-minute clip than a twenty-minute one.
- Highlight your cursor if your software allows it, especially for tutorials where viewers need to follow exactly what you’re clicking.
- Test a short clip first if you’re unfamiliar with a new tool, so you’re not stuck troubleshooting after a 30-minute recording session.
Common Screen Recording Problems and How to Fix Them
Even with reliable, built-in tools, things occasionally go sideways. Here are a few issues people run into when they try to record their screen, along with quick fixes:
No sound in the recording Double-check that you selected the right microphone or enabled “system audio” before you started. On phones, this setting is usually part of the same menu where you start the recording, so it’s easy to miss.
Recording is choppy or laggy This usually happens when your device is low on storage or running too many background apps. Close what you don’t need and make sure you have enough free space, since screen recordings, especially longer ones, can take up several gigabytes.
Black screen when recording certain apps Streaming services, banking apps, and some video call platforms intentionally block screen recording for security or copyright reasons. There’s no workaround for this on the app side, since it’s built into the software you’re trying to record.
Can’t find the saved file Each device saves recordings to a different default folder (Videos > Captures on Windows, Photos on iPhone, Gallery on Android, Downloads on Chromebook). If you’re not sure where yours went, check the notification that pops up right after you stop recording. It usually links straight to the file.
File size is too large to share If you’re trying to email or message a recording and it won’t go through, try trimming it down to just the essential clip, or upload it to a cloud service like Google Drive or Dropbox and share the link instead.
Frequently Asked Questions
Do I need to download an app to record my screen? No. Windows, Mac, iPhone, iPad, Android, and Chromebook all include a free built-in screen recorder. You only need extra software if you want advanced editing or features like webcam overlays.
Can I record my screen and my voice at the same time? Yes, on every device covered here you can turn on your microphone before or during the recording, so your narration gets saved along with the screen capture.
Why won’t some apps let me record them? Apps like Netflix, banking apps, and some video call platforms use built-in restrictions that block screen recording to protect copyrighted or sensitive content. This is intentional and not something you can bypass through settings.
Where do screen recordings get saved by default? It depends on your device. Windows saves to Videos > Captures, Mac saves to the desktop, iPhone saves to Photos, Android saves to the Gallery, and Chromebook saves to Downloads.
Conclusion
Learning how to record your screen doesn’t have to involve downloading anything or digging through confusing settings. Every major device, whether it’s Windows, Mac, iPhone, iPad, Android, or Chromebook, comes with a free, built-in screen recorder that takes just a few clicks to use, and browser-based tools fill in the gaps for anyone who wants a quick option without installing software.
For everyday needs like tutorials, bug reports, or saving a presentation, these native tools are more than enough. If you find yourself recording often and want more editing power, tools like OBS Studio, Loom, or Camtasia are worth exploring. Either way, you now have everything you need to record your screen on any device you own, save it where you want, and share it however works best for you.